This User Guide applies to the currently released Vers PR v9 models. For earlier versions, the User Guide can be found at this link.
Purpose.
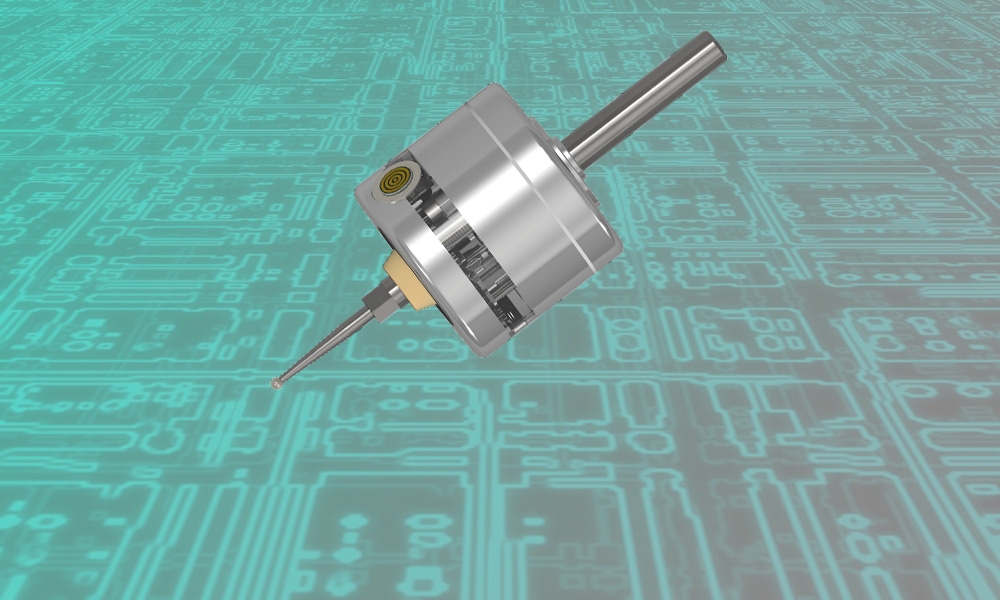
Touch probe Vers PR is designed to determine the exact coordinates of objects mounted on a CNC milling machine. The CNC system generates these coordinates when the VersPR stylus touches the object and uses them to link the processing program to the workpiece location, to measure lengths, diameters, to search for hole centers, etc. The device can be used with various CNC systems: LinuxCNC, Mach3, embedded systems on industrial machines, etc. The device is connected to the CNC system via a cable (see section Connection).
Vers PR v9 main features
1. Unidirectional repeatability 0.001 mm.
2. Tungsten carbide pin-ball contacts.
3. Over travel limit (X,Y) ±10mm, (Z) -7mm
4. Two connector options:
- magnetic - the most convenient jack, suitable for working with plastics and non-ferrous (non-magnetic) metals,
- waterproof - for work in humid environments or with steels.
5. The probe is equipped with both NPN-NC and PNP-NC output types.
6. Protection against short circuits of the output to power or ground, from power reversal.
Specifications.
Unidirectional repeatability | 0.001 mm |
Search directions | ±X, ±Y, -Z |
Over travel limit (X,Y) | ±10 mm |
Over travel limit (Z) | - 7 mm |
Contact force in XY | min 0.5N max 0.8N |
Contact force in Z | 2N |
Power supply | +5v...+24v |
Current сonsumption | <4mA |
Dust protection | Yes |
Splash protection* | Yes* |
Adjustability | Yes |
* only for version with waterproof jack
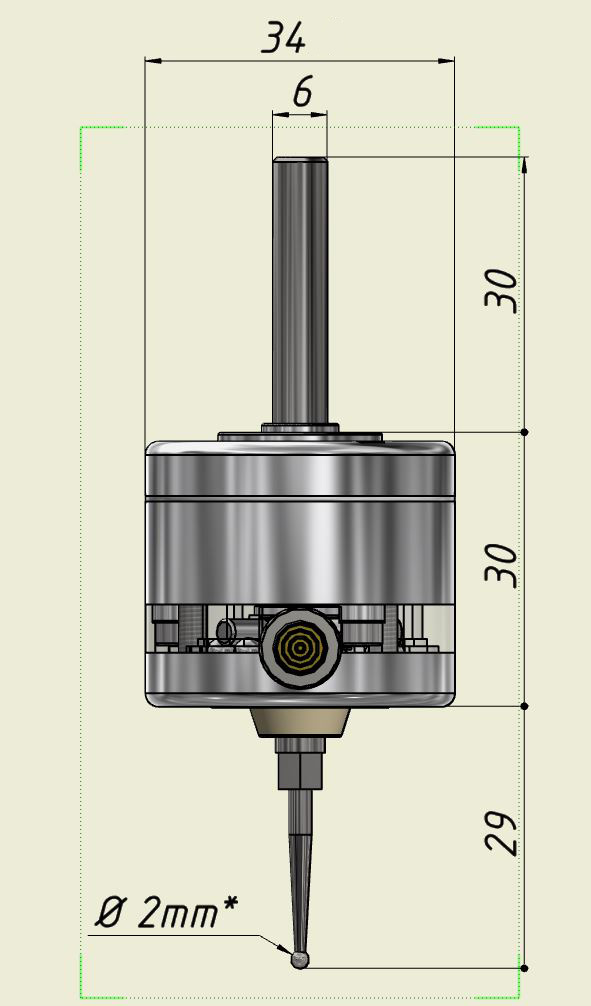
* All sizes are for reference. The diameter of the ball (tip of the stylus) is approximate, in fact it can differ from the specified within ± 0.01 mm, spherical irregularity <0.001 mm.
Adjustment.
It is necessary to adjust the probe before starting the measurement. The probe is installed in the spindle, a check indicator is placed near to it (Fig. 1)
The indicator should be sensitive to a weak effect of 0.3-0.5N (for example, most lever indicators have this property).
The axis of the spindle is rotated by hand and the amplitude of the deflection of the stylus ball from the axis of rotation is controlled by the indicator.
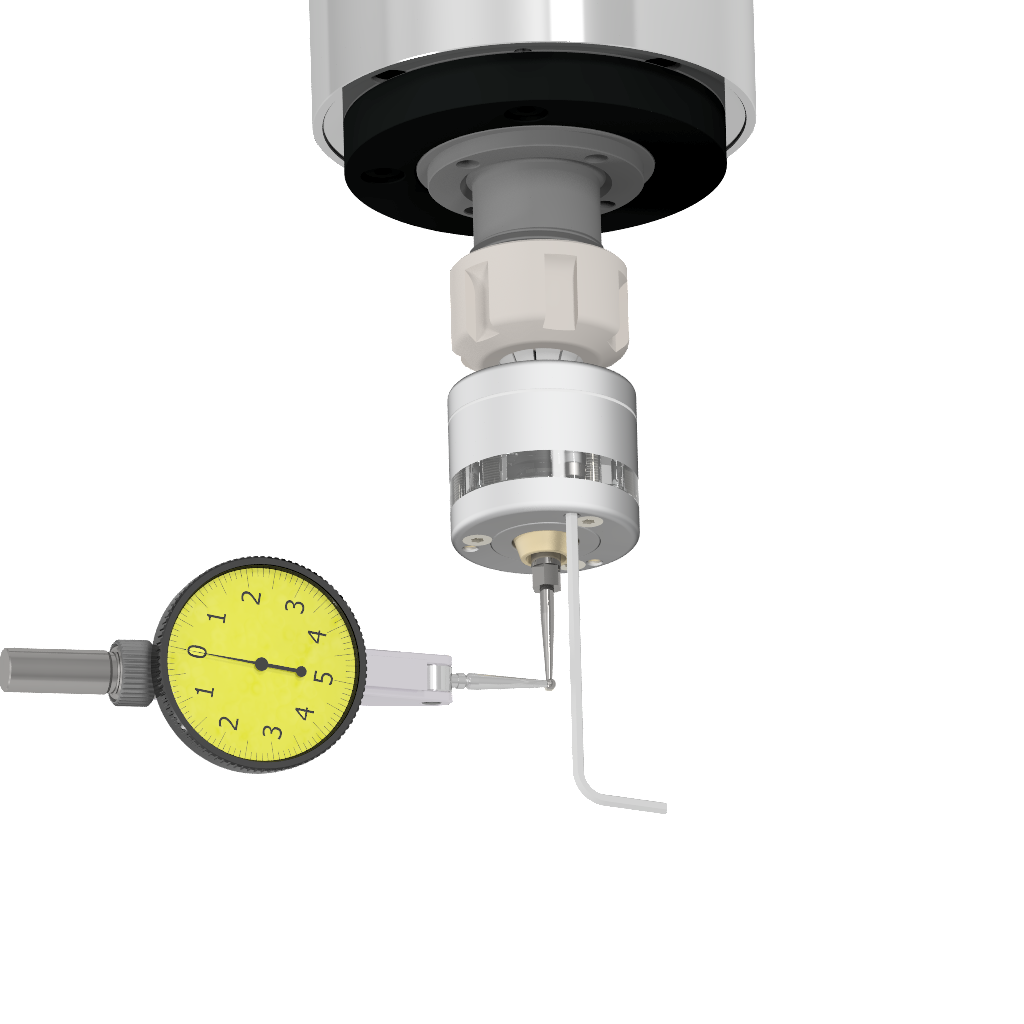
Fig.1
The deviation is eliminated by turning the adjusting screws with a 2mm hex key from the kit. When adjusting, both tightening and loosening of the screws are used.It is recommended to hold for a short lever of the key , so as not to develop excessive force. It will be necessary to perform several cycles of spindle axis rotation--control-- adjustment in order to achieve a minimum deviation acceptable for a particular measurement.
Connection.
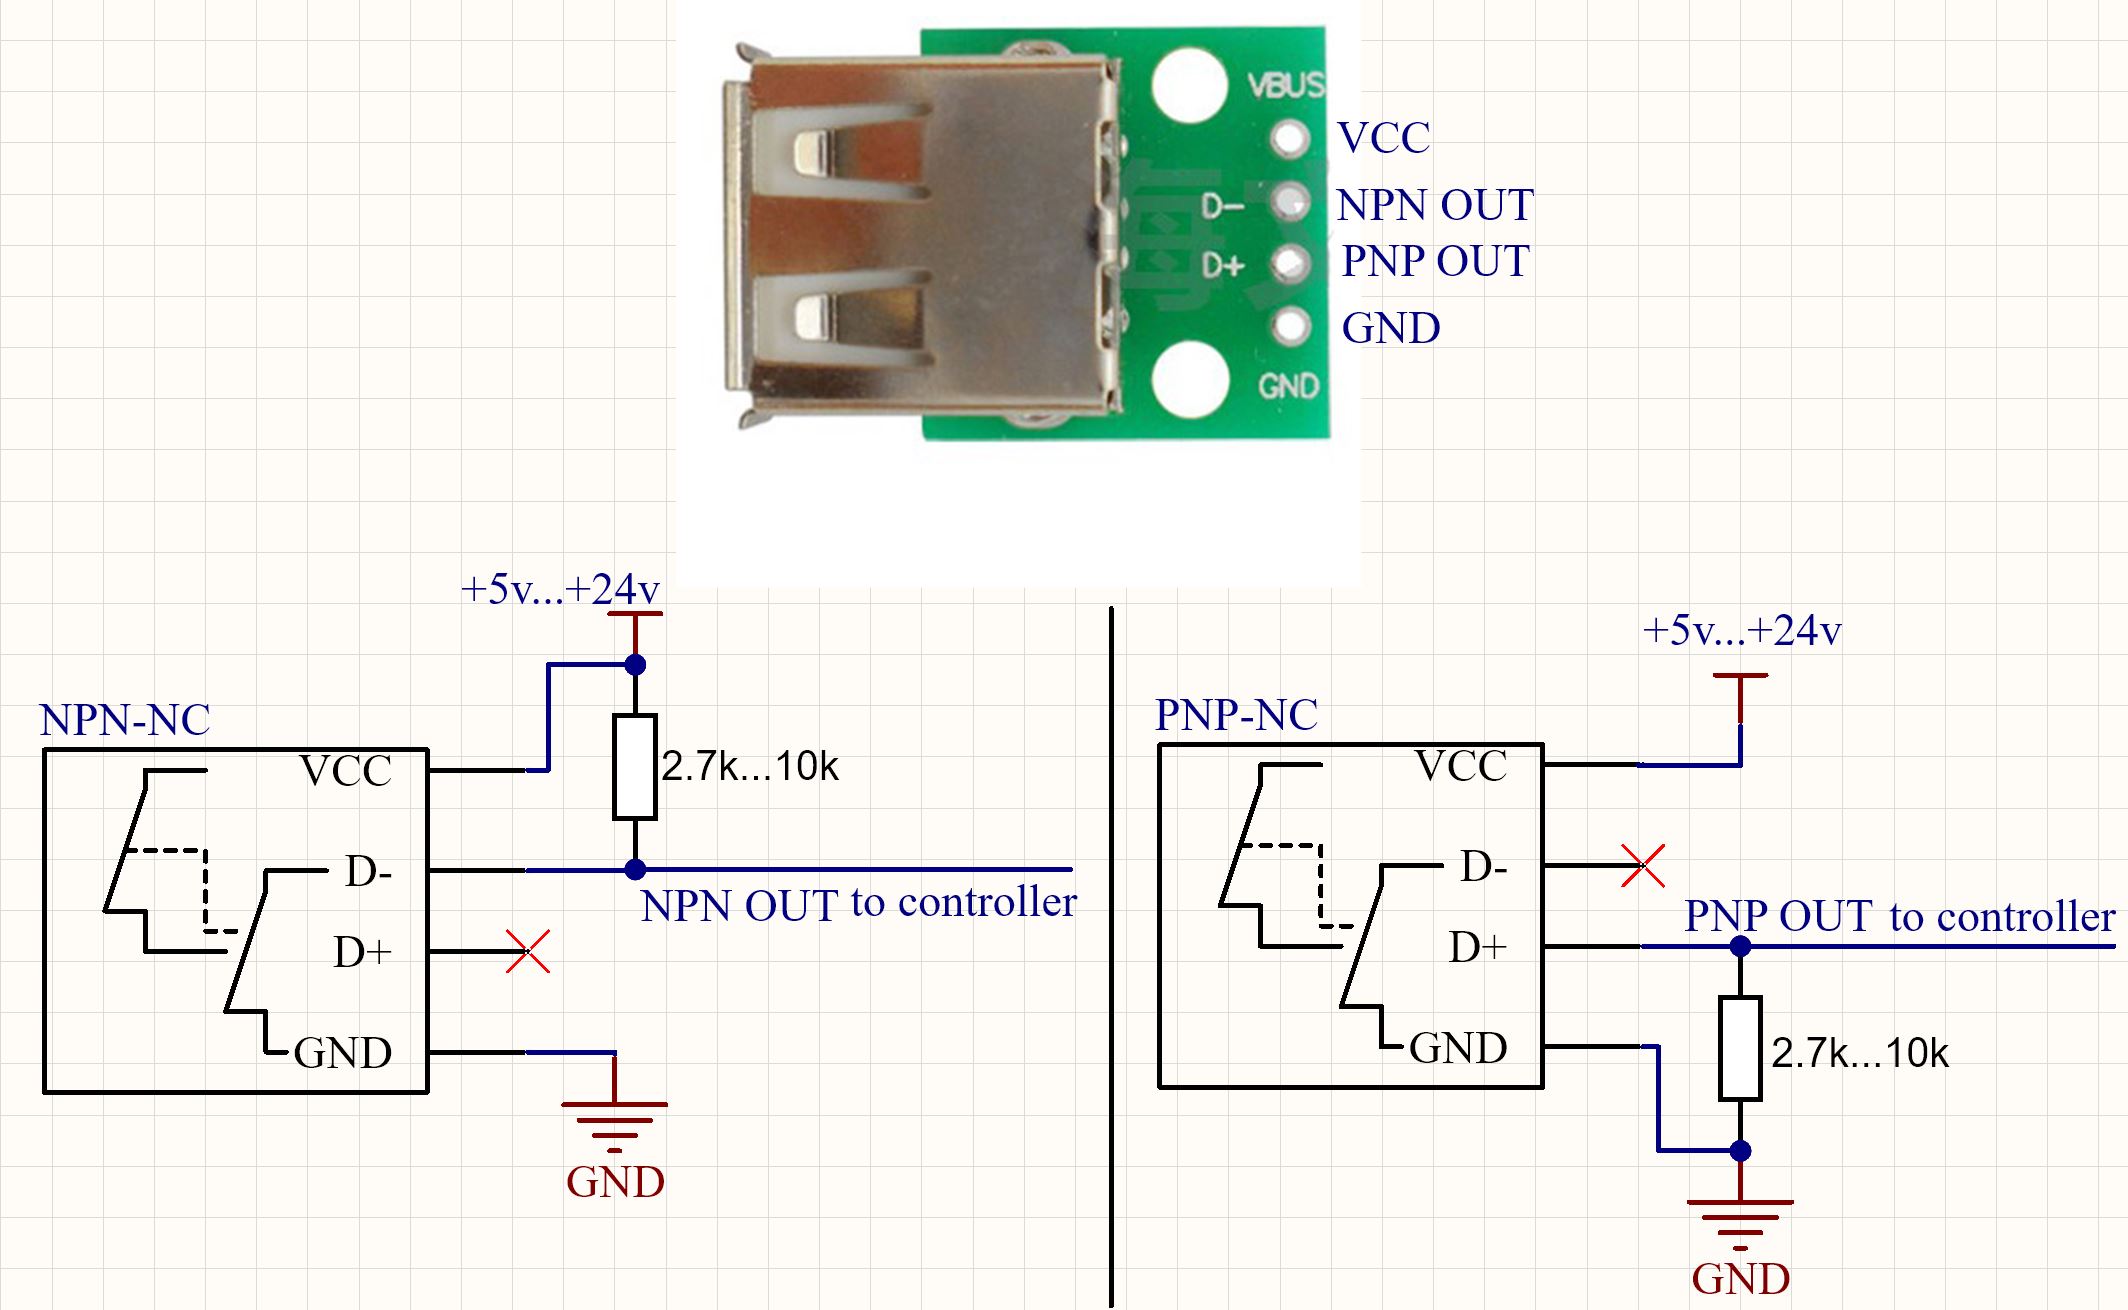
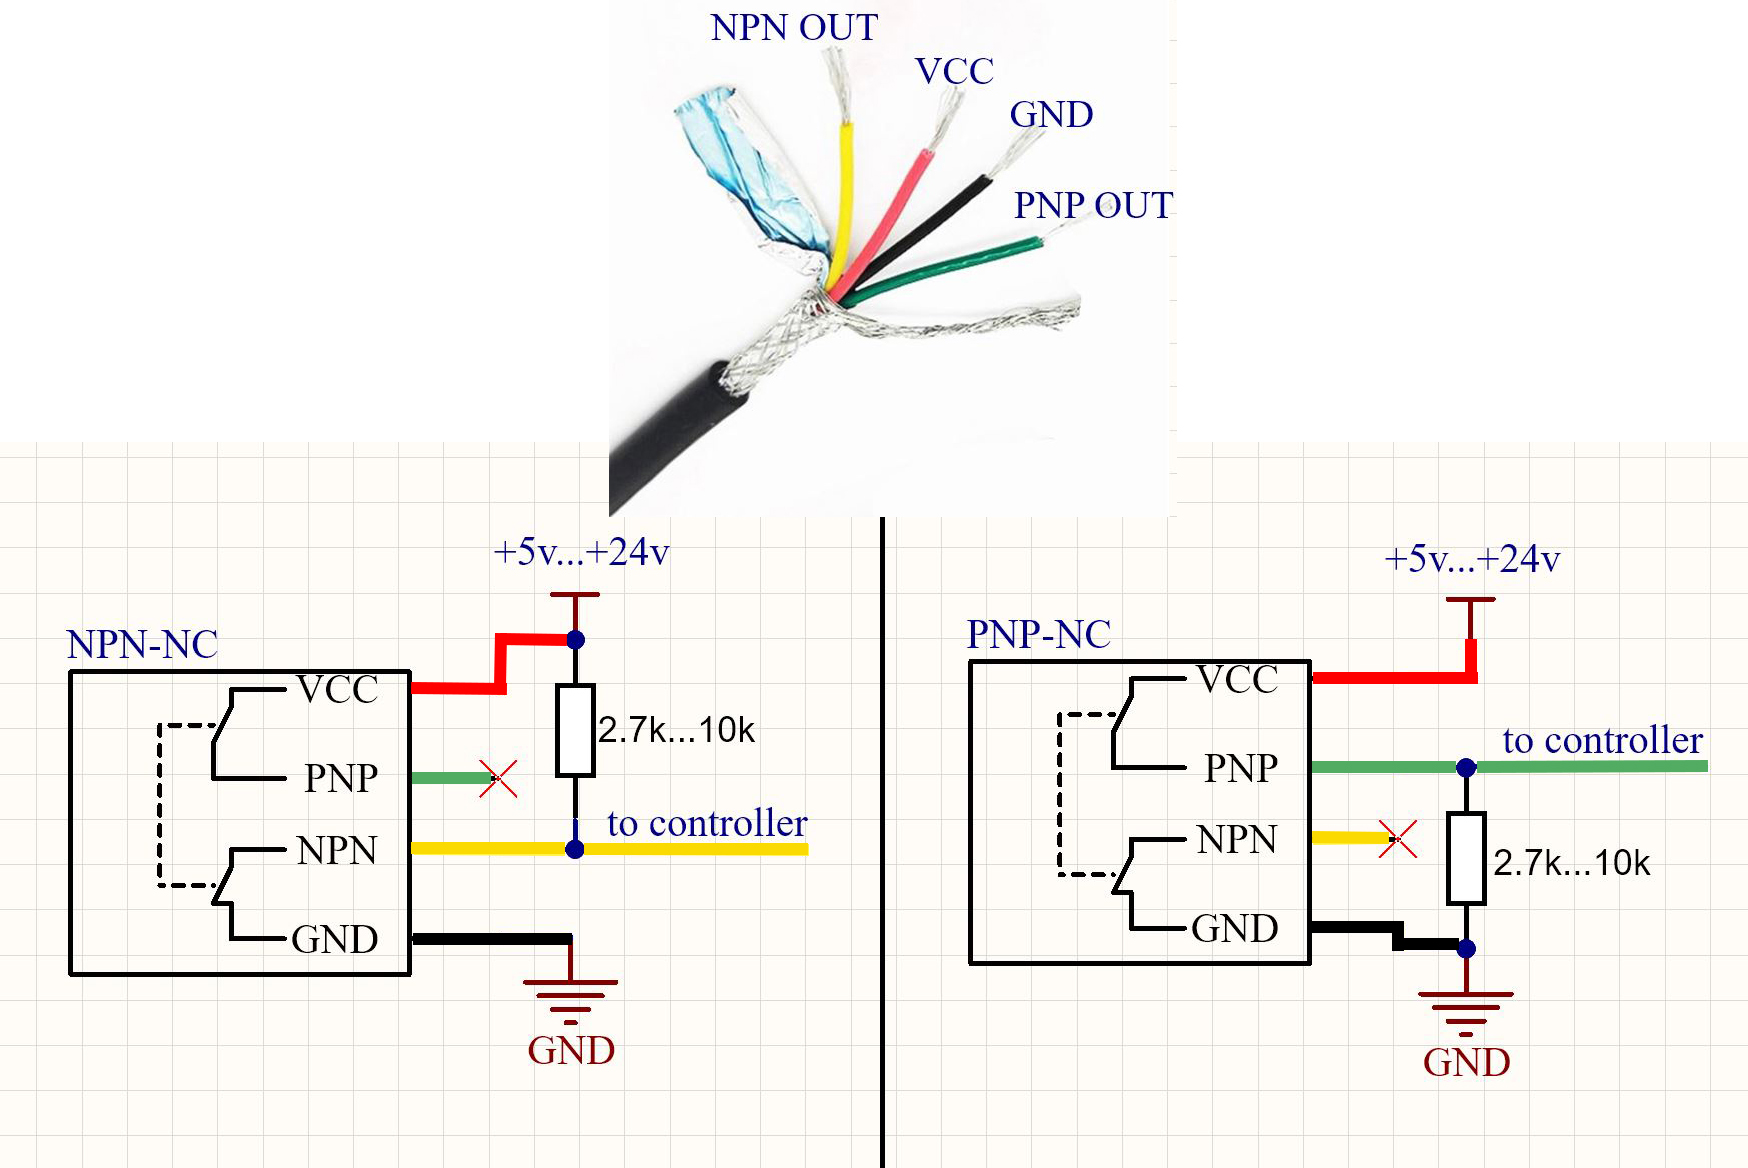
The sensors are equipped with NPN-NC and PNP-NC outputs, polarity reversal protection, protection against short circuits of the output to power and ground.
Both NPN and PNP outputs are built into the device and routed to separate pins.
Wiring diagram to the machine for the version with magnetic connector ( Vers PR v9 magnetic jack )
Wiring diagram to the machine for the version with waterproof connector ( Vers PR v9 waterproof jack ). The colors of the wires inside the cable from the kit correspond to the colors of the connections on the diagram
Using.
There is software ProbeScreen in free access for convenient work with probe in the LinuxCNC,
Probe Wizard - in the Mach3 system.

